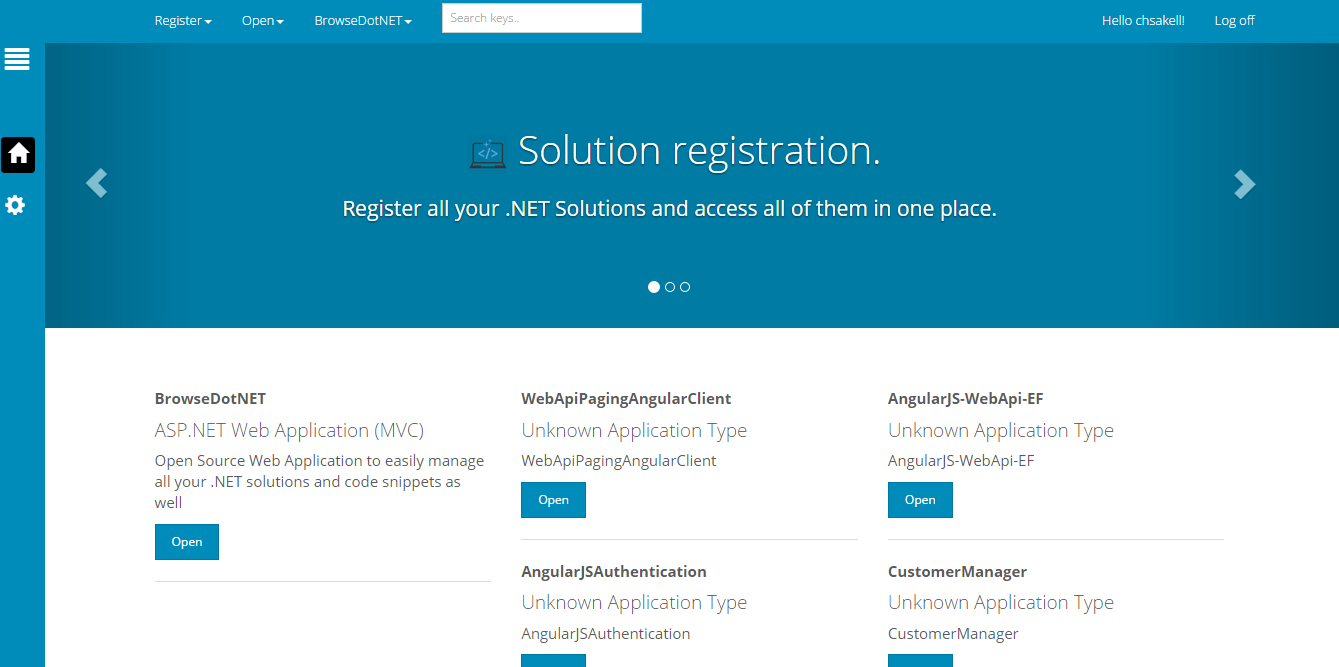
BrowseDotNET is an open source ASP.NET MVC Web Application I created, that can help you manage your computer’s .NET solutions and code samples (programming language indepented) in one place. What does it solve? It’s common sense for developers to have dosens or hundrends of solutions projects in their personal computers with each of them providing a single solution to a specific problem. The thing is, that when the time comes to solve the same problem it’s quite difficult to find the respective solution among dosens and hence you are forced to seek over and over again the same solution on the internet. More over, you might have noticed that there are code snippets which you often use in your applications, but still you always have to get them from the internet.
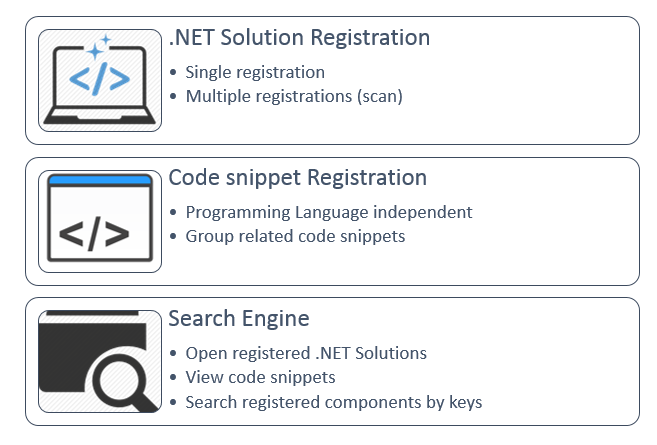
BrowseDotNET features
BrowseDotNET came to solve these two important problems by providing three main features:
This post’s objective is to show how to host and use BrowseDotNET in your personal computer. First let’s see the technologies, frameworks and techniques used for this application.
- ASP.NET MVC 5
- Entity Framework Code First development
- Code First Migrations
- Generic Repository pattern
- Dependency Injection using Autofac framework
- ASP.NET Identity
- Automapper
- FluentValidation API
Installation
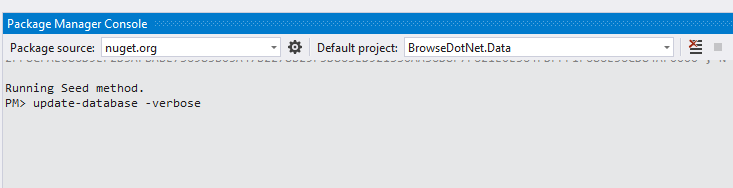
Download BrowseDotNET source code from my Github account. You will find link at the bottom of this post. Build the application to restore packages. Rebuild. Open BrowseDotNET.Data and BrowseDotNET.Web and change the connection strings in their configuration files to reflect your development environment. Next, Open Package Manager Console and enter the following command while having BrowseDotNET.Data as the default project.
update-database -verbose
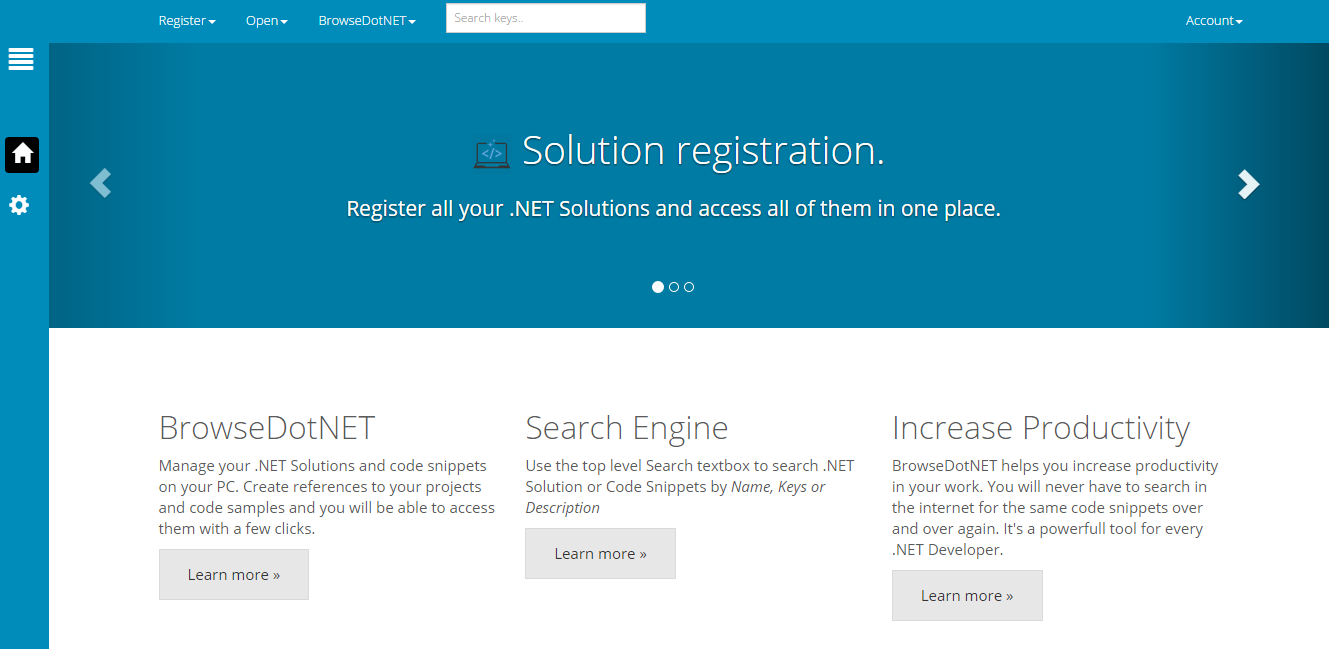
That’s all you need to start BrowseDotNET. Fire the application and you will reach the starting page.
First thing you need to do is create an account. You won’t be able to register solutions and code snippets unless you are an authorized user.

Register single .NET Solution
From the top menu, select Register/Solution and fill all the relative fields. You will be asked to give information for solution’s to be registered file path, name and description and of course search term keys. On the right side, you will always have some hints to help you register either a solution or a code snippet.

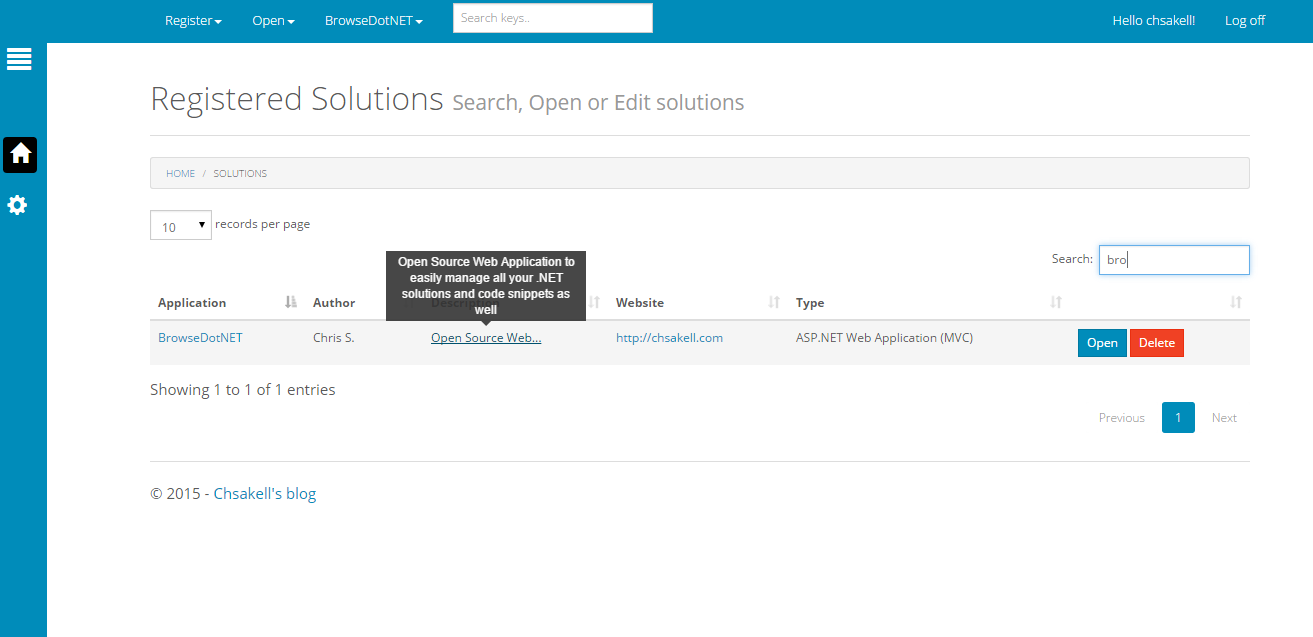
Open, Edit or Remove a registered solution
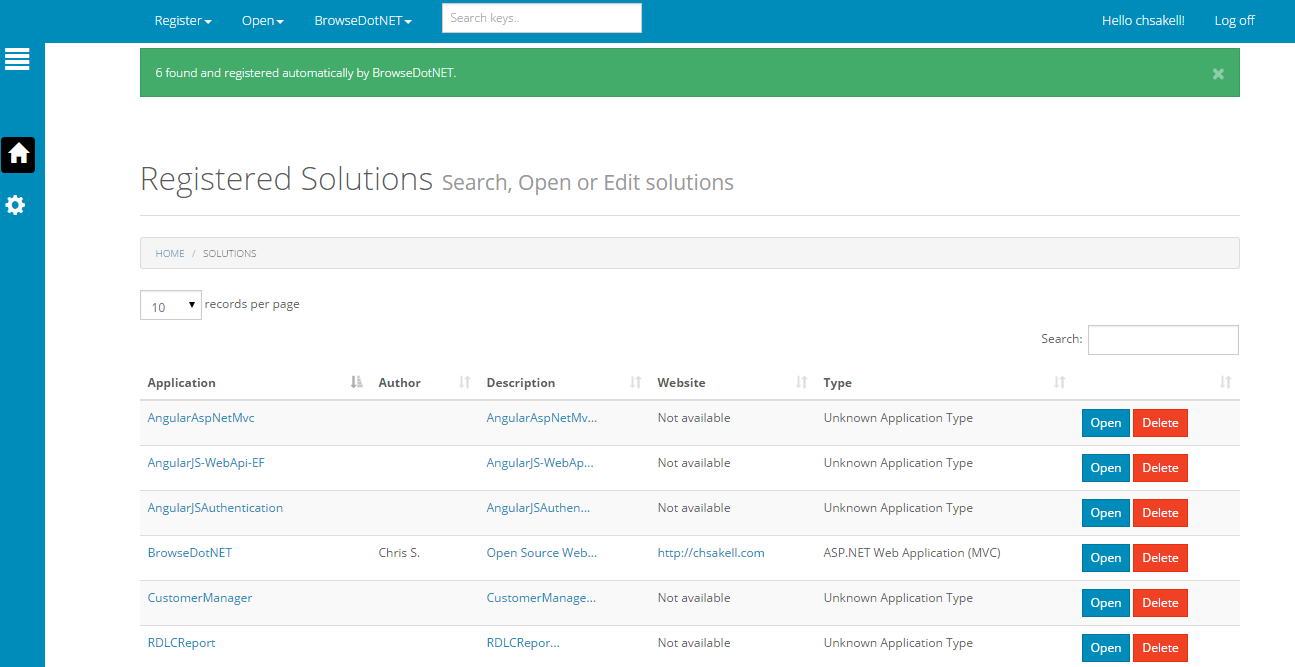
By the time you register a .NET solution, you will be able to open it from BrowseDotNET. From the top menu, select Open/Solution and view all your registered solutions. Of course you can filter your solution by typing into the table’s textbox.
Multiple .NET Solutions registration (scan)
We all have more than one solution in our pc so I decided to create a scanning process to automate registration for you. All you have to do is enter a root directory and then check it’s subdirectories you want to be scanned for .net solutions. BrowseDotNET will search in these folders for .sln files and register them automatically. It will use solution’s file name as solution name and description but you can always edit them later. To start, select from the top menu Register/Scan Solutions and enter a valid root directory path.

If the directory path is valid, you will be redirected to check child folders you want to be scanned.
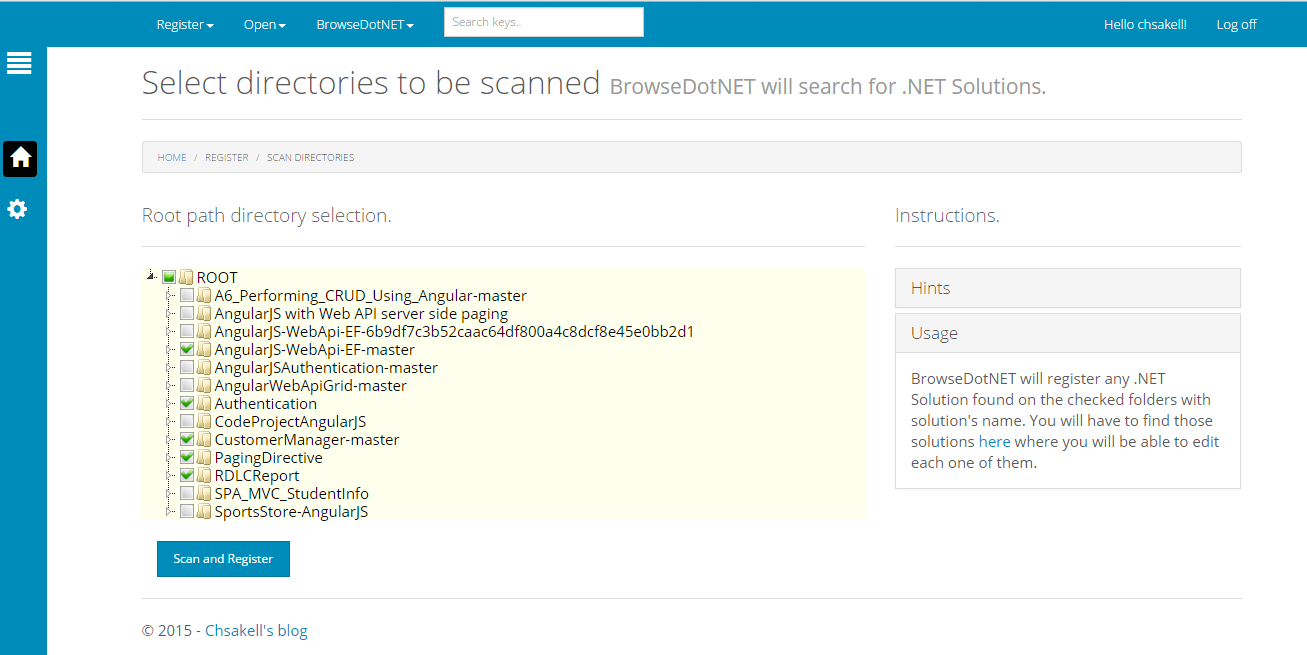
BrowseDotNET will do it’s magic and when finished it will show you registered solutions page.
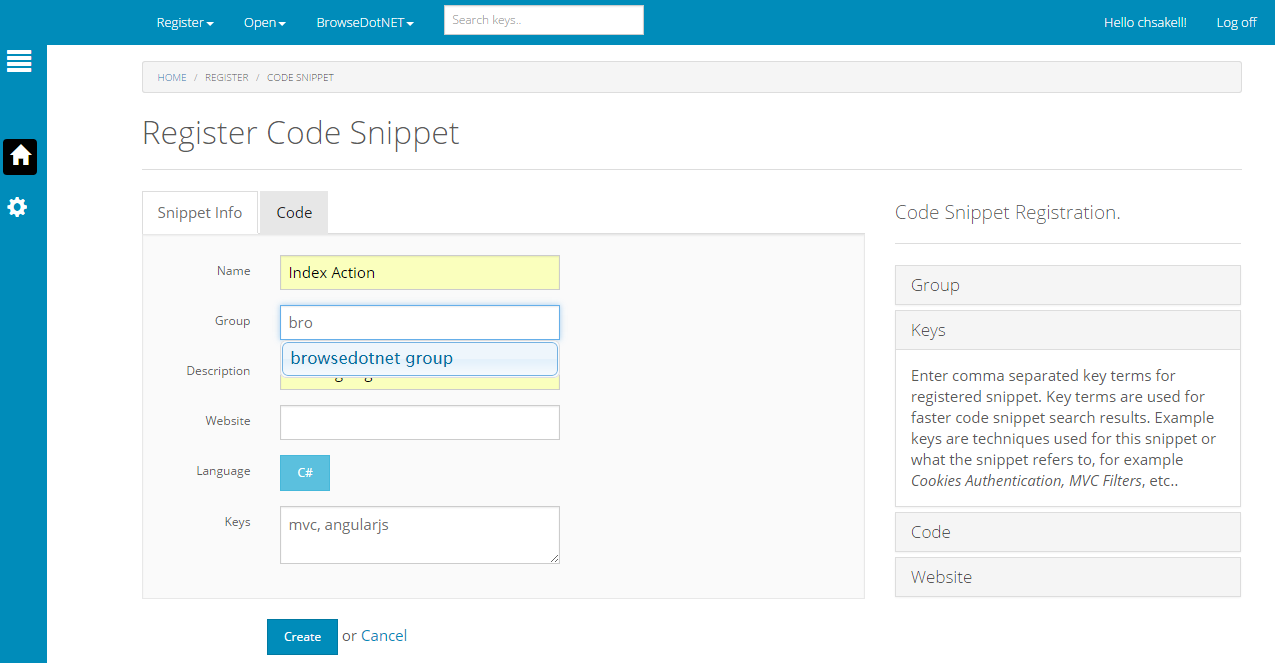
Code snippet registration
Select Register/Code Snippet from the top menu and fill the relative code snippet’s information. There are two tabs, one for snippet’s information and another to paste the code. You can paste code of any language you wish. One thing I want to point is the field Group. Use the same group name to group many code snippets together. For example you can register a C# code snippet and a jQuery code snippet under the same group. Later, you will be able to view them together by selecting this group. This is why I have used an autocomplete textbox for this field. It will help you find group names you have used before.
As soon as you register the snippet you will be able to view it whenever you want. View all of your snippets by selecting Open/Snippets from the top menu.

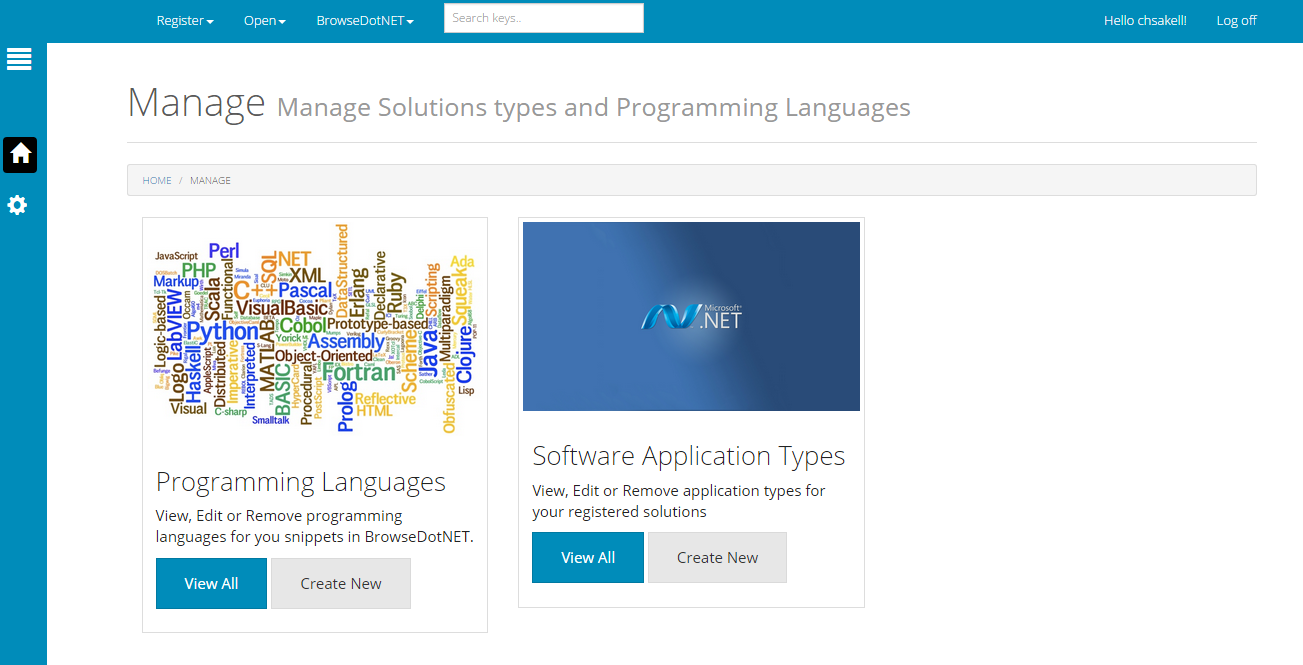
On the left menu you can select settings and set the available Solution Types for your solutions and the available programming languages for you Code Snippets.
Type key terms on the top menu and search .NET Solutions or Code snippets by keys. You will be able to open directly the matched solutions and view the source of your snippets. You can type multiple key terms by comma separating them.

Keys are really important to the search engine so try to be carefull when registering solutions or code snippets. For example if you register a .NET solution with a key mvc and use the same key for registering a code snippet, searching with that term will fetch you both results. Instead, if you use the key term mvc snippet for the snippet registration, BrowseDotNET would fetch again both results but the inner search engine will use two different key records from the database while only one record used on the first case.

As soon as you start registering and opening .NET solutions from BrowseDotNET you will find the most recently used solutions on the first page.
Hosting
You could host BrowseDotNET in your local IIS but unfortunately you cannot start a GUI application from IIS (unless you make serious configurations). What you can do is create a simple .bat file with the following command.
"c:\Program Files\IIS Express\iisexpress.exe" /path:"C:\Path_To_BrowseDotNET\BrowseDotNet.Web" /port:20185
The above command will host BrowseDotNET in iisexpress without running Visual Studio.
Source Code
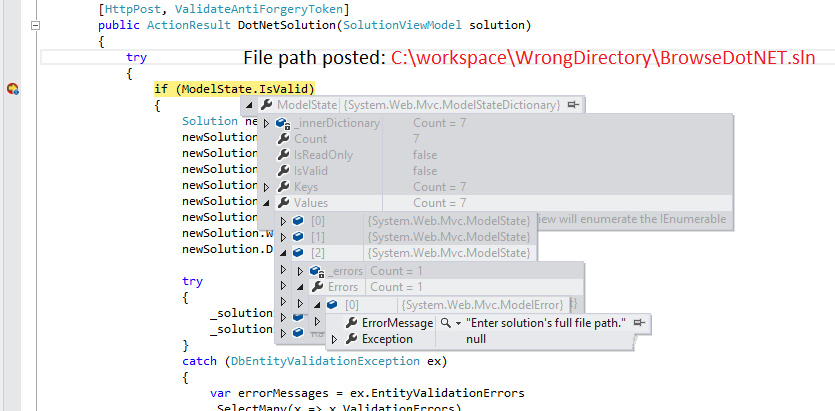
There is a lot of source code to study in BrowseDotNET and I totally recommend you read ASP.NET MVC Solution Architecture – Best Practices and Web API powerful Custom Model Validation with FluentValidation in case you aren’t familiar with those concepts. FluentValidation is used particularly for validating ViewModels. Let’s see the example for validating the FilePath in SolutiongViewModel, the model which is posted back to server when the user registers a solution.
public class SolutionViewModel : IValidatableObject
    {
        public int ID { get; set; }

        [MaxLength(50)]
        public string Author { get; set; }

        [Required]
        [MaxLength(100)]
        [Display(Name = "Application")]
        public string Name { get; set; }

        [Required]
        [MaxLength(250)]
        [Display(Name = "Full Path (.sln)")]
        [RegularExpression(@"^(?:[\w]\:|\\)(\\[a-zA-Z_\-\s0-9\.]+)+\.(sln)$", ErrorMessage = "Invalid file path format.")]
        public string FilePath { get; set; }

        [Required]
        [MaxLength(300)]
        [DataType(DataType.MultilineText)]
        public string Description { get; set; }

        [MaxLength(200)]
        [DataType(DataType.Url)]
        public string Website { get; set; }

        [Required]
        [Display(Name = "Type")]
        public int SolutionTypeID { get; set; }

        [Display(Name = "Type")]
        public string SolutionTypeType { get; set; }

        [Required]
        [MaxLength(200)]
        [DataType(DataType.MultilineText)]
        public string Keys { get; set; }

        public IEnumerable<ValidationResult> Validate(ValidationContext validationContext)
        {
            var validator = new SolutionViewModelValidator();
            var result = validator.Validate(this);
            return result.Errors.Select(item => new ValidationResult(item.ErrorMessage, new[] { item.PropertyName }));
        }
    }
And it’s Validator..
public class SolutionViewModelValidator : AbstractValidator<SolutionViewModel>
    {
        public SolutionViewModelValidator()
        {
            RuleFor(s => s.FilePath)
                .Must(IsValidPath)
                .WithMessage("Enter solution's full file path.");
        }

        private bool IsValidPath(string filePath)
        {
            bool _isValidSolutionPath = new bool();

            try
            {

                if (File.Exists(filePath) && Path.GetExtension(filePath).EndsWith(".sln"))
                    _isValidSolutionPath = true;
            }
            catch
            {
                _isValidSolutionPath = false;
            }

            return _isValidSolutionPath;
        }
    }
Data annotations used for SolutionViewModel in conjuction with jQuery Validation will prevent the user post a string that doesn’t represent a file path ending in .sln.

But even if he does enter a file path that ends with .sln, the ModelState.IsValid will return false if the path posted doesn’t exist in user’s pc. That’s the magic of FluentValidation.
Conclusion
BrowseDotNET is certainly a powerfull tool for .NET developers. The more solutions you have on your pc and the more code snippets you want to easily access, the most you will benefit from BrowseDotNET. Download the source code from here. I’ m certain that you ‘ll enjoy working with it. Happy coding!
Update
Some folks asked me to add a Run as admin button cause they needed to open Visual Studio solutions with administrator rights, so I added that to.

Categories: ADO.NET, ASP.NET, Best practices

Excellent work..
Outstanding project sir, thank you for this contribution.
Excellent Work.
I was able to run the project successfully and the database is created with the required tables. The tables SolutionType and ProgrammingLanguage doesn’t have any data in them.I see there is a Configuration class with a Seed method that feeds both these tables but the seed method is no where called.Am I missing something here? Is there a way to feed these 2 tables by calling the seed method?
Hi Chaitanya,
Configuration’s seed method you mentioned inside BrowseDotNet.Data\Migrations will be called only if the database doesn’t exist and you execute the following line through the Package Manager Console:
update-database -verboseThis uses the Code-First migrations.
In case you just fire the application without running the previous command (I believe this is what you did) Entity Framework Code First will create the database based on it’s model configurations. Of course, you can always add whatever SolutionType(s) and ProgrammingLanguage(s) want by navigating to /Settings/CreateLanguage and /Settings/CreateSolutionType respectively.
Your grid search is client based and you pick all the records and send to view but I want to use custom paging and searching which should be done on server how can I achieve this using $(‘.table’).DataTable() ????
You can take a look at the relative documentation here.
Hi sir..your blog is fantastic.It’s really useful people who start their careers in the dotnet field.Even a experienced programmer can learn lot of stuff from this blog.Thanks a lot for sharing nice articles.Keep up the good work.
You are a good guy,really! Thank you very much. Allmost of your article is really useful for me.
Excellent project.Thanks to provide such a nice project. I want to know, is it possible to browse the solution directory from application?