ListView control is probably the best among all data bind build-in controls in ASP.NET Framework. It is used extensively by ASP.NET Web Forms developers and is preferred between other similar controls, such as the GridView or the DataList. The reason why that happens is pretty much simple. It supports all the CRUD operations for your data-binded items plus is fully customizable. There is one drawback though: you need to know exactly how ListView control works with other controls such as the Data-Source controls and despite the fact that Visual Studio allows to configure the control via the Design mode from the Smart Tag, the most times you will need to change the generated code in order to function properly. Rather than talking let’s create a Web Form where we will use a ListView control to support CRUD operations for our items. To give you a taste about how our ListView will look like, take a look at the following picture which will be the costumized template for displaying Review objects.

Before starting you need to know about our database tables. In this post I’m gonna use two simple tables. Genre and Review. Genre table will represent all availables Movie Genres while a Review will represent a review about a movie. There is One-To-Many relationship between those tables, where a Genre can have many reviews attached and a review must be bind to only one Genre. If you want to follow along with this post, at the bottom of the page you can download the project we will create (as always), where you can find attached the SQL script you need to create the database and it’s tables.

Let’s start. In Visual Studio 2012 create a new web site, choosing the Empty ASP.NET Web site template. Name the site ListViewExample. The first thing we will do is create the Entities to be used for our data-binding controls. Since we have already a database with two tables, we can use the Database-First Entity Framework’s approach to create the classes automatically. Right click your web site and add a new item named MovieEntities of type ADO.NET Entity Data Model.
Click add and then press OK if prompted to create App_Code folder in your solution automatically. Continue by selecting Generate from database option and make sure you configure your SQL Server connection properly so it points to the right MovieStore database. 
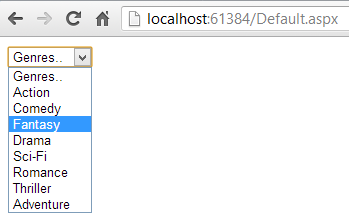
Click next and continue by selecting the right tables Genre, Review for your entity model. Leave the default name for the namespace MovieStoreModel and click finish to exit the wizard. As soon as you exit the wizard your entities are ready to used. Save and build your solution. You may notice that changes have been made to your Web.config file. It’s time to create our Web Form. Add a new Web Form named Default and make sure it has a code behind file. We need a functionality where we can select a Genre and then the ListView will display the respective genre’s reviews. So add a DropDownList control to your page with Id=”ddlGenres”. In design mode click the ddlGenres list and check the Enable AutoPostBack property. While still in design mode click on it’s smart tag, click Edit Items.. and add an Item as follow.

Click OK and from the “ddlGenres” properties make sure you change the AppendDataboundItems from false to true. Now we need to append the Genre items using an EntityDataSource control. In design mode click on the ddlGenres list control’s smart tab and select Choose Data Source... Select New datasource.. and then choose Entity. You can leave the default name EntityDataSource1. In the next window, select the MovieStoreEntities named connection we created before and click Next. Finally choose the two columns we are interested in, Id and Name of the Genre table. 
Click Finish and finally select the Name property to be displayed on your DropDownList control leaving the Id as the value field. Your page with these two control should look like this right now.
<%@ Page Language="C#" AutoEventWireup="true" CodeFile="Default.aspx.cs" Inherits="_Default" %>

<!DOCTYPE html>

<html xmlns="http://www.w3.org/1999/xhtml">
<head runat="server">
    <title></title>
</head>
<body>
    <form id="form1" runat="server">
    <div>

        <asp:DropDownList ID="ddlGenres" runat="server" AppendDataBoundItems="True" AutoPostBack="True"
            DataSourceID="EntityDataSource1" DataTextField="Name" DataValueField="Id">
            <asp:ListItem Value="">Genres..</asp:ListItem>
        </asp:DropDownList>
        <asp:EntityDataSource ID="EntityDataSource1" runat="server" ConnectionString="name=MovieStoreEntities"
            DefaultContainerName="MovieStoreEntities" EnableFlattening="False" EntitySetName="Genres"
            Select="it.[Id], it.[Name]">
        </asp:EntityDataSource>

    </div>
    </form>
</body>
</html>
Request your page in a browser and make sure it works fine.
Ok, it’s time for the good stuff. Instead of dropping a ListView control in our page, something most developers do, here we will choose a different approach. You saw from the previous step that you can configure EntityDataSource or other server controls in Design mode but at the end, only few lines added in the Mark up. So why bother figuring out how and what to select in design mode while you can hard code exactly what you want your control to do, in the mark up? More over, mind that configuring advanced controls such as ListView in design mode, will result lot of unnecessary code to fill your mark up page. Let’s create our new EntityDataSource for example. This data-source will retrieve all Reviews based on the selected Genre from the dropdownlist. Add the following code right below the “EntityDataSource1” mark up code.
<asp:EntityDataSource ID="EntityDataSource2" runat="server" ConnectionString="name=MovieStoreEntities"
                DefaultContainerName="MovieStoreEntities" EnableDelete="True" EnableFlattening="False"
                EnableInsert="True" EnableUpdate="True" EntitySetName="Reviews" Where="it.Genre.Id=@Id">
                <WhereParameters>
                    <asp:ControlParameter ControlID="ddlGenres" Name="Id" Type="Int32" PropertyName="SelectedValue" />
                </WhereParameters>
            </asp:EntityDataSource>
It is really easy to understand. We added a new EntityDataSource control with the same connection name “MovieStoreEntities” in order to use our Entity Framework’s generated entities. We declared we want to support Insert, Update and Delete operations through the following properties:
EnableInsert="True"
EnableUpdate="True"
EnableDelete="True"
We also defined that we want to query results from the Reviews EntitySetName filtering the results based on the Review.Genre.Id Navigation property
EntitySetName="Reviews"
Where="it.Genre.Id=@Id"
Finnaly we set the filtering-where parameters so that the selected dropdownlist value is used for the @Id value
<WhereParameters>
     <asp:ControlParameter ControlID="ddlGenres" Name="Id" Type="Int32" PropertyName="SelectedValue" />
</WhereParameters>
In the above code you can see that you need to define the control you want to retrieve the parameter value from, plus it’s type and it’s respective property. Our datasource is ready to be used and fill a ListView control so let’s add one right below the dropdown list.
<asp:ListView ItemType="Review" ID="ListView1" runat="server" DataKeyNames="Id"
                DataSourceID="EntityDataSource2" InsertItemPosition="LastItem">
                <ItemTemplate>
                    <li>
                        ItemTemplate
                    </li>
                </ItemTemplate>
                <InsertItemTemplate>
                    <li>
                        InsertItemTemplate
                    </li>
                </InsertItemTemplate>
                <LayoutTemplate>
                    <ul id="itemPlaceholderContainer" runat="server" style="list-style-type: none">
                        <li runat="server" id="itemPlaceholder" />
                    </ul>
                    <div style="">
                        <asp:DataPager ID="DataPager1" runat="server" PageSize="1">
                            <Fields>
                                <asp:NextPreviousPagerField ButtonType="Button" ShowFirstPageButton="True"
                                    ShowLastPageButton="True" />
                            </Fields>
                        </asp:DataPager>
                    </div>
                </LayoutTemplate>
            </asp:ListView>
Let’s examine the code we wrote. In the first two lines we declared that our ListView control will accept Review entities (ItemType=”Review”), will be bound on the second EntityDataSource control (DataSourceID=”EntityDataSource2″) and that it will use the Id Review property to uniquely identify a row in the ListView (DataKeyNames=”Id”). So far so good. What we wrote next is more interesting. First of all we declared the LayoutTemplate where we told that we want our items to be displayed as unordered list items.
<LayoutTemplate>
  <ul id="itemPlaceholderContainer" runat="server" style="list-style-type: none">
      <li runat="server" id="itemPlaceholder" />
  </ul>
     <div style="">
         <asp:DataPager ID="DataPager1" runat="server" PageSize="1">
              <Fields>
                   <asp:NextPreviousPagerField ButtonType="Button" ShowFirstPageButton="True"
                        ShowLastPageButton="True" />
              </Fields>
         </asp:DataPager>
     </div>
</LayoutTemplate>
The DataPager control simply supports pagination for our items. Then we declared two more templates, the ItemTemplate and the InsertTemplate.
<ItemTemplate>
     <li>
        ItemTemplate
     </li>
</ItemTemplate>
 <InsertItemTemplate>
      <li>
InsertItemTemplate
      </li>
</InsertItemTemplate>
The ItemTemplate is the template for displaying our items while the insert template is the one for inserting items. At the moment they display only raw text but I am sure you got the idea (you can run your page to test it).

There is one more template we will add later , the EditItemTemplate. The point is that now you can edit any template you want so that it renders the data in the way you want. If you follow the default procedure configuring a ListView control, I ensure you that you will be disappointed by the result. Let’s costumize the ItemTemplate now. I want to display following Review properties with the respective controls:
- Property: Title ===========> Control: Label
- Property: Summary =========> Control: MultiLine TextBox
- Property: Body ============> Control: MultiLine TextBox
- Property: Authorized ======> Control: CheckBox
- Property: CreateDateTime ==> Control: Label
- Property: UpdateDateTime ==> Control: Label
I also want to render each item in a table row where the first cell will display the property and the second the value. Finally, we want two buttons in order to Edit or Delete the Item. The final mark up code you need to add is the following.
<ItemTemplate>
                    <span style="color: royalblue; font-size: larger">Review Details..</span>
                    <li style="">
                        <table style="box-shadow: 5px 2px 10px black; background-color: royalblue; color: ghostwhite;">
                            <tr>
                                <td>Title:</td>
                                <td>
                                    <asp:Label ID="TitleLabel" runat="server" Text='<%# Item.Title %>' /></td>
                            </tr>
                            <tr>
                                <td>Summary:</td>
                                <td>
                                    <asp:TextBox ID="TextBox1" Rows="4" Columns="45" runat="server" Text='<%# Item.Summary %>' TextMode="MultiLine"></asp:TextBox>
                                </td>
                            </tr>
                            <tr>
                                <td>Body:</td>
                                <td>
                                    <asp:TextBox ID="TextBox2" Rows="4" Columns="45" runat="server" Text='<%# Item.Body %>' TextMode="MultiLine"></asp:TextBox></td>
                            </tr>
                            <tr>
                                <td>Authorized</td>
                                <td>
                                    <asp:CheckBox ID="AuthorizedCheckBox" runat="server" Checked='<%# Item.Authorized %>' Enabled="false" Text="" /></td>
                            </tr>
                            <tr>
                                <td>Created:</td>
                                <td>
                                    <asp:Label ID="CreateDateTimeLabel" runat="server" Text='<%# Eval("CreateDateTime","{0:d}") %>' /></td>
                            </tr>
                            <tr>
                                <td>Updated:</td>
                                <td>
                                    <asp:Label ID="UpdateDateTimeLabel" runat="server" Text='<%# Eval("UpdateDateTime") %>' /></td>
                            </tr>
                        </table>
                        <asp:Button ID="EditButton" runat="server" CommandName="Edit" Text="Edit" />
                        <asp:Button ID="DeleteButton" runat="server" CommandName="Delete" Text="Delete" />
                    </li>
                </ItemTemplate>
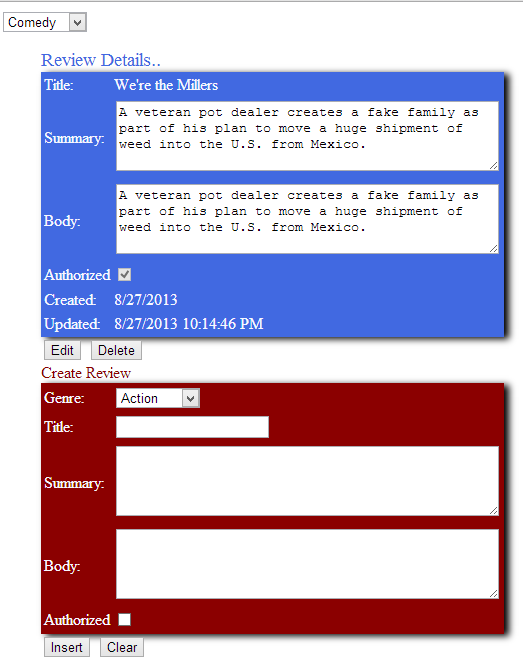
If you run the page now and select a genre you will get the following result for the ItemTemplate.

Pretty nice I think. There are two things I want to mention. The first is to notice the CommandName property in the Button controls and the other one is the use of the strongly type Item.Property In the databind expressions. You will see that in the InsertItemTemplate and the EditItemTemplate we will use the BindItem.Property. The difference is that the former only shows the value while the latter reflects any changes to the database through the EntityDataSouce control. Change the InsertItemTemplate as follow.
<InsertItemTemplate>
                            <span style="color: darkred">Create Review</span>
                            <li style="">
                                <table style="box-shadow: 5px 2px 10px black;background-color: darkred; color: ghostwhite;">
                                    <tr>
                                        <td>Genre:</td>
                                        <td>
                                            <asp:DropDownList ID="DropDownList2" runat="server" AppendDataBoundItems="True"
                                                DataSourceID="EntityDataSource1" DataTextField="Name" DataValueField="Id">
                                            </asp:DropDownList>
                                        </td>
                                    </tr>
                                    <tr>
                                        <td>Title:</td>
                                        <td>
                                            <asp:TextBox ID="TitleLabel" runat="server" Text='<%# BindItem.Title %>' /></td>
                                    </tr>
                                    <tr>
                                        <td>Summary:</td>
                                        <td>
                                            <asp:TextBox ID="TextBox1" Rows="4" Columns="45" runat="server" Text='<%# BindItem.Summary %>' TextMode="MultiLine"></asp:TextBox>
                                        </td>
                                    </tr>
                                    <tr>
                                        <td>Body:</td>
                                        <td>
                                            <asp:TextBox ID="TextBox2" Rows="4" Columns="45" runat="server" Text='<%# BindItem.Body %>' TextMode="MultiLine"></asp:TextBox></td>
                                    </tr>
                                    <tr>
                                        <td>Authorized</td>
                                        <td>
                                            <asp:CheckBox ID="AuthorizedCheckBox" runat="server" Checked='<%# BindItem.Authorized %>' Enabled="true" Text="" /></td>
                                    </tr>
                                </table>
                                <asp:Button ID="InsertButton" runat="server" CommandName="Insert" Text="Insert" />
                                <asp:Button ID="CancelButton" runat="server" CommandName="Cancel" Text="Clear" />
                            </li>
                        </InsertItemTemplate>
Same story here, we defined exactly how we want to render our items while in Insert mode. Notice also, we used a dropdownlist in order to select a Genre for a new Review. The rendering result is the following..

Mind though, that if you try to insert a new review at the moment you will get an error telling you that database couldn’t convert DateTime2 to DateTime or that GenreId value wasn’t found. That happens because if you have noticed, in the InsertItemTemplate we don’t provide values either for the CreateDateTime or UpdateDateTime or the GenreId properties. DateTime values are configured to be updated automatically in the database using the default value getdate() but still, you need to provide with a DateTime value. To overcome this problem, changed in Design mode, click the ListView control, and in the properties find and double click the ItemInserting event. This event a good place to configure a property value before actually send to the database. Go to the code behind file and in the handler that has generated for you when you double clicked the event add the following code.
protected void ListView1_ItemInserting(object sender, ListViewInsertEventArgs e)
    {
        DropDownList ddlGenres = (DropDownList)e.Item.FindControl("DropDownList2");
        e.Values["GenreId"] = Int32.Parse(ddlGenres.SelectedValue);
        e.Values["UpdateDateTime"] = DateTime.Now;
        e.Values["CreateDateTime"] = DateTime.Now;
    }
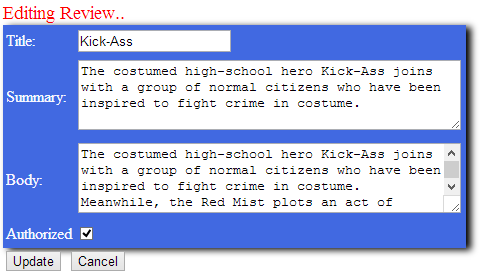
Build your application and make sure Insert works just fine. You cannot edit at the moment any review cause we actually haven’t create the respective template. Add the following template inside the ListView control.
<EditItemTemplate>
                            <span style="color:red;font-size:larger">Editing Review..</span>
                            <li style="">
                                <li style="">
                                    <table style="box-shadow: 5px 2px 10px black;background-color: royalblue; color: ghostwhite;">
                                        <tr>
                                            <td>Title:</td>
                                            <td>
                                                <asp:TextBox ID="TitleLabel" runat="server" Text='<%# BindItem.Title %>' /></td>
                                        </tr>
                                        <tr>
                                            <td>Summary:</td>
                                            <td>
                                                <asp:TextBox ID="TextBox1" Rows="4" Columns="45" runat="server" Text='<%# BindItem.Summary %>' TextMode="MultiLine"></asp:TextBox>
                                            </td>
                                        </tr>
                                        <tr>
                                            <td>Body:</td>
                                            <td>
                                                <asp:TextBox ID="TextBox2" Rows="4" Columns="45" runat="server" Text='<%# BindItem.Body %>' TextMode="MultiLine"></asp:TextBox></td>
                                        </tr>
                                        <tr>
                                            <td>Authorized</td>
                                            <td>
                                                <asp:CheckBox ID="AuthorizedCheckBox" runat="server" Checked='<%# BindItem.Authorized %>' Enabled="true" Text="" /></td>
                                        </tr>
                                    </table>
                                    <asp:Button ID="UpdateButton" runat="server" CommandName="Update" Text="Update" />
                                    <asp:Button ID="CancelButton" runat="server" CommandName="Cancel" Text="Cancel" />
                                </li>
                        </EditItemTemplate>
The rendering result will be the following.
Again if you try to update a record you will get the same errors so switch again in Design and this time double-click the ListView’s ItemUpdating event. In the code behind file add the following code.
protected void ListView1_ItemUpdating(object sender, ListViewUpdateEventArgs e)
    {
        e.NewValues["UpdateDateTime"] = DateTime.Now;
    }
Build your application and test all CRUD operations. They should work just fine.
What I tried to show you in this post, is that you cannot always depend on the default ListView’s control behavior and hence using the smart tag or the working only in design mode isn’t the best solution. Instead you need to carefully configure all and only the properties you need, leaving that way any unnecessary mark up code outside. A good solution would be starting in design mode, remove any unnecessary code and make the configurations. Download the web site we created from here. Inside the project you will find a folder SQL with the script you need to create the database. Make sure though, in the Web.config file you make the appropriate changes in order to connect to your SQL Server instance. I hope you enjoyed the post as much as I did. If you want to get notified for new posts in this blog make sure you click the Follow button.

Reblogged this on Sutoprise Avenue, A SutoCom Source.
You can use discussion groups and forums
to convince visitors to stay logged in to your site for a longer time.
Unveiling a business or website is not an easy task; it carries lots of pressure in the bearer mind.
With online businesses, it’s very important to have good uptime,
which means no downtime.
Hmm it seems like your blog ate my first comment (it was super long) so
I guess I’ll just sum it up what I had written and say, I’m thoroughly enjoying your blog.
I as well am an aspiring blog writer but I’m still new to the whole thing.
Do you have any points for rookie blog writers? I’d certainly appreciate it.
Well, I would say that every blogger has his own style of writting, that is describing in words what he wants to share. So first of all, when you start writting, just make sure you know exactly what you want to share. In my case, after I have decided what i want to share, I start with preparing the code (you will see that most of my posts have a solution to download at the bottom). Preparing the code means, developing, testing and uploading the solution to a repository. Finally, I write the post and share it. Another important thing to remember is to write your own code (at least as much as possible). Be simple and write comments too. If you copy and paste code of other blogs, readers won’t like it at all. I hope i helped.
Kind regards,
C.S
An intriguing discussion is definitely worth comment.
There’s no doubt thaat that you shoould write more about this
topic, iit migyht noot be a taboo subject but usually folks don’t discuss these subjects.
To the next! Cheers!!
I’ve learn a few excellent stuff here. Definitely price bookmarking forr revisiting.
I wonder how so much effort you plasce too make any
such grreat informative web site.