It’s been a while since I last posted but I came back with two extremely interesting concepts: WCF Restful services and MSMQ queues in WCF. What this post is going to show you, is
- how to create and consume a WCF Restful service using the webHttpBinding and a UriTemplate
- how to write and read from an MSMQ without WCF, using multi-threading
- how to use WCF service to automate reading from an MSMQ using the MsmqIntegrationBinding binding
To demonstrate all these features we will create a sub-system that is usually part of large scale applications. This sub-system has 4 basic components. The first one will simulate an application that when a specific event happens, triggers a call to a WCF Restful service, passing some values through the query string. The second component will be the WCF Restful service, catching the information passed to it’s OperationContract through the query string. The same component will write some data based on the retrieved value in a MSMQ. The third component will be another console application which will use multi-threading to read and retrieve specific messages from the previous written queue. The same component will write some data in another queue. The last component will be another WCF service, which is going to use the MsmqIntegrationBinding binding to automatically read second’s queue records. I know there are a lot to be seen and create here, but I can assure you it’s going to be really interesting. The system we are going to create is illustrated in the following picture.

Let’s start. Open Visual Studio and create a blank solution named “SystemSimulation”. First we will create Component 2, so right click the solution and create a new C# console application named “WcfRestfulServiceComp”. We need to add references to specific libraries in order to use both WCF Framework and MSMQ. Right click your project and add references to System.ServiceModel, System.ServiceModel.Web, System.Messaging, System.Configuration assemblies. Create a new interface named “IHttpService” and add the following code.
using System;
using System.Collections.Generic;
using System.Linq;
using System.ServiceModel;
using System.ServiceModel.Web;
using System.Text;
using System.Threading.Tasks;

namespace WcfRestfulServiceComp
{
    [ServiceContract]
    public interface IHttpService
    {
        [OperationContract]
        [WebInvoke(Method = "GET", ResponseFormat = WebMessageFormat.Xml,
            BodyStyle = WebMessageBodyStyle.Wrapped, UriTemplate = "person/{id}")]
        void CreatePerson(string id);
    }
}
This is our WCF service contract. I highlighted the most important lines of the above code. In order to create a Restful service you need to annotate your OperationContact with the WebInvoke attribute. You also define the URL pattern that this operation contract listens to, through it’s UriTemplate property. In our code, we defined that this operation can be invoked with a URL like this.
http://"path_where_wcfServiceIsHosted_"/person/#id
Notice also that the segment {id} in the UriTemplate matches the CreatePerson method’s parameter. Create a new class file named HttpService.cs to implement the above interface. Paste the following code.
using System;
using System.Collections.Generic;
using System.Linq;
using System.Text;
using System.Threading.Tasks;

using System.Messaging;
using System.Xml.Serialization;
using System.IO;

namespace WcfRestfulServiceComp
{
    public class HttpService : IHttpService
    {

        public void CreatePerson(string id)
        {
            SendMessageToQueue(".\\private$\\SystemSimulationQueue1", id);
        }

        private static void SendMessageToQueue(string queueName, string id)
        {

            // check if queue exists, if not create it

            MessageQueue msMq = null;

            if (!MessageQueue.Exists(queueName))
            {
                msMq = MessageQueue.Create(queueName);
            }
            else
            {
                msMq = new MessageQueue(queueName);
                msMq.MessageReadPropertyFilter.Priority = true;
            }
            try
            {

                Person p1 = new Person
                {
                    PersonID = Int32.Parse(id),
                    Name = "Christos",
                    Address = "Athens",
                    Age = 27
                };

                Person p2 = new Person
                {
                    PersonID = Int32.Parse(id)+25,
                    Name = "Alex",
                    Address = "USA",
                    Age = 25
                };

                Message msg1 = new Message(p1);
                msg1.Label = p1.Name;
                msg1.Priority = MessagePriority.Normal;

                Message msg2 = new Message(p2);
                msg2.Label = p2.Name;
                msg2.Priority = MessagePriority.Normal;

                msMq.Send(msg1);
                Console.WriteLine("Person object sent with ID  " + p1.PersonID);

                msMq.Send(msg2);
                Console.WriteLine("Person object sent with ID  " + p2.PersonID);

                Console.WriteLine();


            }
            catch (MessageQueueException ee)
            {
                Console.Write(ee.ToString());
            }
            catch (Exception eee)
            {
                Console.Write(eee.ToString());
            }
            finally
            {
                msMq.Close();
            }
            Console.WriteLine("Message sent ......");

        }
    }
}
Before explain the important lines of the above code, add a new class named Person to your project, so the compiler wont complaint.
using System;
using System.Collections.Generic;
using System.Linq;
using System.Text;
using System.Threading.Tasks;

namespace WcfRestfulServiceComp
{
    public class Person
    {
        public int PersonID;
        public string Name;
        public string Address;
        public int Age;
    }
}
The CreatePerson OperationContract, receives an Id value from the query string and calls a SendMessageToQueue method. This method creates an MSMQ queue to your local PC named as it’s first parameter. We will see later where exactly is this queue located but for now just pay attention how you can create an MSMQ and how you can send a message of type “Message” through the Send method. In the try block, I create two instances of Person and write them to the queue. This is for demonstration purposes only. So, when this contract is invoked, two Person objects are going to be written in our first queue. These object will have at least their PersonID value different (if the first one has PesronID=30, the second will have PersonID=55). Notice also that I give a special value to the Message.Label property, assigning it to the Person.Name property each time. I did this, so later our threads will be able to retrieve only specific messages from the queue, based on their Label property. We need to tell that our service can be called through HttpWeb calls so paste the following code to your App.config file.
<?xml version="1.0" encoding="utf-8" ?>
<configuration>
  <startup>
    <supportedRuntime version="v4.0" sku=".NETFramework,Version=v4.5" />
  </startup>
  <appSettings>
    <!-- use appSetting to configure MSMQ queue name -->
    <add key="baseAddress" value="http://localhost:8000/WcfRestfulServiceComp/Service" />
  </appSettings>
  <system.serviceModel >
    <services>
      <service
        name="WcfRestfulServiceComp.HttpService" behaviorConfiguration="ServiceBehaviour" >
        <endpoint address="" binding="webHttpBinding" behaviorConfiguration="web"
                  contract="WcfRestfulServiceComp.IHttpService">
        </endpoint>
      </service>
    </services>
    <behaviors>
      <serviceBehaviors>
        <behavior name="ServiceBehaviour">
          <!-- To avoid disclosing metadata information, set the value below to false and remove the metadata endpoint above before deployment -->
          <serviceMetadata httpGetEnabled="true"/>
          <!-- To receive exception details in faults for debugging purposes, set the value below to true.  Set to false before deployment to avoid disclosing exception information -->
          <serviceDebug includeExceptionDetailInFaults="false"/>
        </behavior>
      </serviceBehaviors>
      <endpointBehaviors>
        <behavior name="web">
          <webHttp/>
        </behavior>
      </endpointBehaviors>
    </behaviors>
    <serviceHostingEnvironment multipleSiteBindingsEnabled="true"/>
  </system.serviceModel >
  <system.webServer>
    <modules runAllManagedModulesForAllRequests="true"/>
  </system.webServer>
</configuration>
Now we have to host our service. We will do this in our Program.cs file, in the main method. Paste the following code.
using System;
using System.Collections.Generic;
using System.Linq;
using System.Text;
using System.Threading.Tasks;
using System.ServiceModel;
using System.Configuration;
namespace WcfRestfulServiceComp
{
class Program
{
static void Main(string[] args)
{
// Get base address from appsettings in configuration.
Uri baseAddress = new Uri(ConfigurationManager.AppSettings["baseAddress"]);
// Create a ServiceHost for the CalculatorService type and provide the base address.
using (ServiceHost serviceHost = new ServiceHost(typeof(HttpService), baseAddress))
{
// Open the ServiceHostBase to create listeners and start listening for messages.
serviceHost.Open();
// The service can now be accessed.
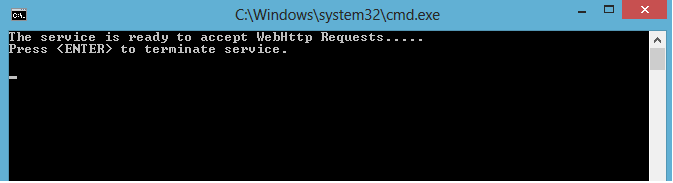
Console.WriteLine("The service is ready to accept WebHttp Requests.....");
Console.WriteLine("Press <ENTER> to terminate service.");
Console.WriteLine();
Console.ReadLine();
// Close the ServiceHostBase to shutdown the service.
serviceHost.Close();
}
}
}
}
Before testing our service you need to do two important things. Otherwise you wont be able to run your service in your PC. First, you need to install MSMQ in your computer. You can’t use MSMQ if you haven’t installed this component. Luckily, this is a Windows feature so open Turn Windows features on or of of your control panel, find Microsoft Message Queue Server, check the appropriate checkboxes as follow and click OK. You may need to restart your computer so the changes take effect (or may not).

The second thing you must do, is to run your visual studio with Administrator rights. Otherwise you won’t be able to register port 8000 we use for our service. So just close your solution, right click Visual Studio and select Run as Administrator. Build your solution and run it. You should see in your console that your service is hosted..
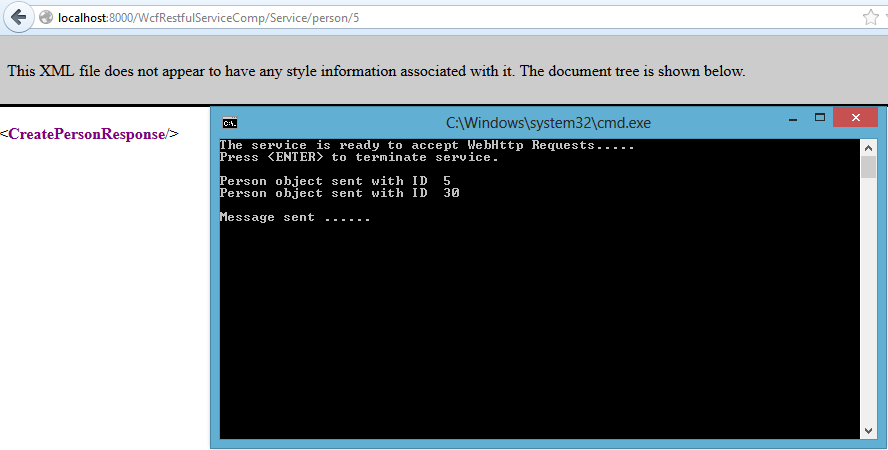
While your service is hosted, paste the following link in your browser..
http://localhost:8000/WcfRestfulServiceComp/Service/person/5
Check you console’s reaction..
Now the interesting part. We supposed we have written two Person objects in an MSMQ, so where the hell is this queue located? Right click your computer and select manage. Expand “Services and Applications” and then “Message Queuing”. If you haven’t installed MSMQ in the previous step, you won’t see the “Message Queuing” folder. Expand your Private Queues and notice your new MSMQ named “systemsimulationqueue1” you have created. Expand it and click you view your queue messages. Right click one, select properties and view the Body tab..

Every time you request such a URL while your service is hosted, two Person object are going to be written in your MSMQ. Do not hesitate to create more objects in your queue. If you want later, you can right click it and delete it. Then run your application again, there is no problem. Next we will create Component 1 of our system, in order to call the service via a console application. Right click your solution and create a console application named ConsumeWcfRestfulServiceClient. Add a reference to the System.Net assembly and paste the following code to the main method of the Program.cs file.
using System.Net;

namespace ConsumeWcfRestfulServiceClient
{
    class Program
    {
        static void Main(string[] args)
        {
            Console.WriteLine("System Simulation.....");
            Console.WriteLine();
            Console.WriteLine("Press c to create a webhttprequest");

            string answer = Console.ReadLine();

            while (answer == "c")
            {
                Random gen = new Random();
                int id = gen.Next(0, 1000);
                HttpWebRequest myReq = (HttpWebRequest)WebRequest.Create("http://localhost:8000/WcfRestfulServiceComp/Service/person/" + id);
                HttpWebResponse webResp = (HttpWebResponse)myReq.GetResponse();
                answer = Console.ReadLine();
            }
        }
    }
}
The program just send HttpWeb requests to your service, every time you press “c”. Now right click your solution and set as “Start up projects” you two projects (Set Action to Start). Build and run your solution. Press “c” in your client application, see that simultaneously the service catch the request and write two objects in the MSMQ.

So far so good. Now we need to create the Component 3, in order to read specific messages from our MSMQ. This component will use two different threads and each thread will retrieve only messages based on the Message.Label property. Later will some data to another MSMQ. Right click your solution and create another console application named ThreadsReadWcfQueue. And references to the System.Net assembly and the “WcfRestfulServiceComp” project (in order to access the Person class). Paste the following code in the Program.cs file.
using System;
using System.Collections.Generic;
using System.Linq;
using System.Text;
using System.Threading.Tasks;

using System.Messaging;
using System.Threading;
using WcfRestfulServiceComp;

namespace ThreadsReadWcfQueue
{
    class Program
    {
        private static Object locker = new Object();

        static void Main(string[] args)
        {
            Console.WriteLine("Press w to create a new thread");
            string answer = Console.ReadLine();

            while (answer == "w")
            {
                Thread worker1 = new Thread(ReadQueue);
                worker1.Start("Christos");

                Thread worker2 = new Thread(ReadQueue);
                worker2.Start("Alex");

                worker1.Join();
                worker2.Join();
                answer = Console.ReadLine();
            }
            Console.WriteLine("Messages downloaded...");
        }

        static void ReadQueue(object label)
        {
            MessageQueue msgQ = new MessageQueue(".\\private$\\SystemSimulationQueue1");
            for (int i = 0; i < 20; i++)
            {
                ReadQueueMessagesByLabel(msgQ, label.ToString());
                Thread.Sleep(7000);
            }
        }

        private static void ReadQueueMessagesByLabel(MessageQueue msgQ, string label)
        {
            Person person = new Person();
            Object o = new Object();
            System.Type[] arrTypes = new System.Type[2];
            arrTypes[0] = person.GetType();
            arrTypes[1] = o.GetType();
            msgQ.Formatter = new XmlMessageFormatter(arrTypes);

            Message[] messages = msgQ.GetAllMessages();
            foreach (Message msg in messages)
            {
                if (msg.Label == label)
                {
                    person = (Person)msgQ.ReceiveById(msg.Id).Body;
                    Console.WriteLine();
                    Console.WriteLine("Message retreived....");
                    Console.WriteLine("Person ID: " + person.PersonID);
                    Console.WriteLine("Name: " + person.Name);
                    Console.WriteLine("Address: " + person.Address);
                    Console.WriteLine("Age: " + person.Age);

                    SendMessageToQueue(".\\private$\\SystemSimulationQueue2", person);
                    Console.WriteLine("Thread is sleeping....");
                    Console.WriteLine("-----------------------------------------------");
                    Console.WriteLine();
                    Thread.Sleep(3000);
                }
            }
        }

        private static void SendMessageToQueue(string queueName, Person person)
        {

            // check if queue exists, if not create it

            MessageQueue msMq = null;

            lock (locker)
            {
                if (!MessageQueue.Exists(queueName))
                {
                    msMq = MessageQueue.Create(queueName);
                }
                else
                {
                    msMq = new MessageQueue(queueName);
                    msMq.MessageReadPropertyFilter.Priority = true;
                }
            }
            try
            {


                Message msg = new Message(person);
                msg.Label = person.Name;
                msg.Priority = MessagePriority.Normal;

                msMq.Send(msg);
                Console.WriteLine("Person object pushed to second queue. Person ID: " + person.PersonID);
                Console.WriteLine();


            }
            catch (MessageQueueException ee)
            {
                Console.Write(ee.ToString());
            }
            catch (Exception eee)
            {
                Console.Write(eee.ToString());
            }
            finally
            {
                msMq.Close();
            }

        }
    }
}
I have highlighted the important lines again. We pass a string to the Start method in our threads, passing the Message label for each thread, to retrieve the appropriate Messages only. Lines 49-54 shows the appropriate way to deserialize objects from an MSMQ. The GetAllMessages function reads but not delete the messages from the MSMQ. As soon as we check the Label property we can delete the respective Message (+ the Message.Body) from the queue using the ReceiveById(msg.Id).Body method. Add this project to the Start up Projects in your solution, build the solution and run it. Notice that as soon as you press “w” to start your threads, every time you press “c” in your client project, the respective thread will retrieve only messages accoarding the the Message label. Ensure that when the threads read messages from the first queue, the accoarding messages are deleted too. Now the messages exist only in the second queue. Watch it in action..


Now it’s time to create the last component of our system, Component 4. This is going to be a WCF service that uses a MsmqIntegrationBinding binding to read MSMQ messages as soon as the are entered into the queue. You don’t have to write code for reading or manipulating the messages. This is going to be automated by the WCF service itself. Add a fourth console application project in your solution, named “WcfServiceReadSecondQueue”. Add references to System.ServiceModel, System.Messaging, System.Transactions, System.Configuration assemplies and a reference to “WcfRestuflServiceComp” project. Add an Interface file named “IPersonService” to your project and paste the following code.
using System;
using System.Collections.Generic;
using System.Linq;
using System.ServiceModel;
using System.ServiceModel.MsmqIntegration;
using System.Text;
using System.Threading.Tasks;
using System.Messaging;
using WcfRestfulServiceComp;


namespace WcfServiceReadSecondQueue
{
    [ServiceContract(Namespace = "http://WcfServiceReadSecondQueue")]
    [ServiceKnownType(typeof(Person))]
    public interface IPersonService
    {
        [OperationContract(IsOneWay = true, Action = "*")]
        void ProcessPerson(MsmqMessage<Person> msg);
    }
}
Add a C# class named PersonService to implement the above interface and paste the following code.
using System;
using System.Collections.Generic;
using System.Linq;
using System.ServiceModel;
using System.ServiceModel.MsmqIntegration;
using System.Text;
using System.Threading.Tasks;
using WcfRestfulServiceComp;

namespace WcfServiceReadSecondQueue
{
    class PersonService : IPersonService
    {
        [OperationBehavior(TransactionScopeRequired = true, TransactionAutoComplete = true)]
        public void ProcessPerson(MsmqMessage<Person> ordermsg)
        {
            Person p = (Person)ordermsg.Body;
            Console.WriteLine("Processing Person ID {0} ", p.PersonID);
            Console.WriteLine("Name: " + p.Name);
            Console.WriteLine("Address: " + p.Address);
            Console.WriteLine("Age: " + p.Age);
            Console.WriteLine("Person processed......");
            Console.WriteLine("----------------------------");
            Console.WriteLine();
        }
    }
}
You will probably have already noticed the MsmqMessage of type Person parameter. This ensures that the WCF service will automatically deserialize incoming MSMQ messages to Person objects. Now we need to tell the service to use the appropriate binding so it can access the respective MSMQ when messages are entered in the latter one. Open and paste the following code to the App.config file.
<?xml version="1.0" encoding="utf-8" ?>
<configuration>
    <startup>
        <supportedRuntime version="v4.0" sku=".NETFramework,Version=v4.5" />
    </startup>
  <appSettings>
    <!-- use appSetting to configure MSMQ queue name -->
    <add key="personQueueName" value=".\private$\SystemSimulationQueue2" />
    <add key="baseAddress" value="http://localhost:8000/WcfServiceReadSecondQueue/Service" />
  </appSettings>
  <system.serviceModel>
    <services>
      <service
        name="WcfServiceReadSecondQueue.PersonService" >
        <endpoint address="msmq.formatname:DIRECT=OS:.\private$\SystemSimulationQueue2"
							    binding="msmqIntegrationBinding"
                  bindingConfiguration="PersonProcessorBinding"
                  contract="WcfServiceReadSecondQueue.IPersonService">
        </endpoint>
      </service>
    </services>

    <bindings>
      <msmqIntegrationBinding>
        <binding name="PersonProcessorBinding" exactlyOnce="false">
          <security mode="None" />
        </binding>
      </msmqIntegrationBinding>
    </bindings>

  </system.serviceModel >
</configuration>
Last thing remained to do is to host this service. Paste the following code to the main method of your Program.cs file.
using System;
using System.Collections.Generic;
using System.Configuration;
using System.Linq;
using System.ServiceModel;
using System.Text;
using System.Threading.Tasks;
using WcfFromMsmqService;
using WcfServiceReadSecondQueue;

namespace WcfFromMsmqService
{
    class Program
    {
        static void Main(string[] args)
        {
            // Get base address from appsettings in configuration.
            Uri baseAddress = new Uri(ConfigurationManager.AppSettings["baseAddress"]);

            // Create a ServiceHost for the CalculatorService type and provide the base address.
            using (ServiceHost serviceHost = new ServiceHost(typeof(PersonService), baseAddress))
            {
                // Open the ServiceHostBase to create listeners and start listening for messages.
                serviceHost.Open();

                // The service can now be accessed.
                Console.WriteLine("The service is ready.");
                Console.WriteLine("Press <ENTER> to terminate service.");
                Console.WriteLine();
                Console.ReadLine();

                // Close the ServiceHostBase to shutdown the service.
                serviceHost.Close();
            }
        }
    }
}
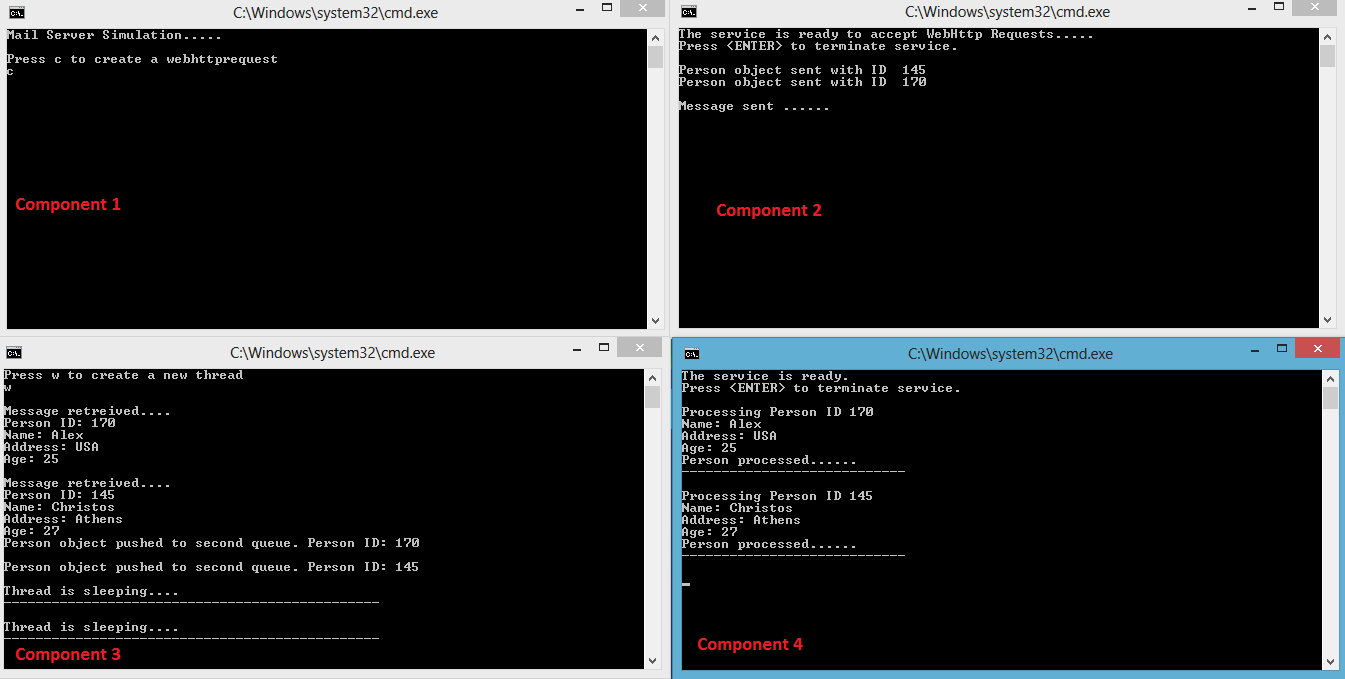
Well, you need to know that as soon as you start this project it will try to find and access the second MSMQ, so if you have deleted that queue you will get an error. You have two options. Either ensure that second queue exist so feel free to add this project to your solution’s Start up projects among the others. Then you can build your solution and run it. The other option is to run first Componets 1,2,3 and then start Component 4. Either way, check how WCF MSMQ service works. As soon as you press “c” in your first Component, Component 2 will send two Person objects into the first MSMQ. If Component 3 runs, two threads are responsible to read specific messages and send them to the second MSMQ. As soon as those messages are entered into the second queue, the WCF service (Component 4) will automatically read and delete them… You can see our system running in the following picture.
That’s it. We have seen many useful things in this post such as Restful WCF services, MSMQ in WCF and even multi-threading support. I hope you enjoyed the post. You can download the SystemSimulation project we created from here.
Categories: Best practices, WCF

great sample man
Very good job