As you may know, there are many UI frameworks available, that you can make use of in order to create richable user interfaces for your application. Default ASP.NET controls such as ListView or GridView are really good and easy to use but when it comes to functionality and extensibility, they are kind of limited. This post will show you how to create a richable list using the Ext.NET component framework. Take a look at what we are going to create:

This is a list displaying information for some famous actors in a specific format. Notice the functionality that the list offers.
- You can filter actors by their name
- You can sort them by their last name
- The list only shows 5 actors at a time providing Paging functionality
- The most important: All these happen using Ajax requests without refreshing the page
- Each time you click to see next or previous page, the list receives only the respective data.
If you are new to Ext.NET component framework, that’s OK. It’s a good opportunity for you to check its great capabilities. Ext.NET framework, provides richable controls such as the default ASP.NET server controls, but with greater functionality. The framework integrates the cross-browser Sencha Ext JS JavaScript Library which means, if you want to master it’s controls you will be benefit if you master the latter JavaScript library too. Let’s stop talking about it and create the above list. I would like here to mention that in the download link you will find at the bottom of the post, you can download the project described here but without the Ext.NET framework installed. This is due to it’s large size. All you have to do as you will understand later, is to install it by yourself through the Nuget Packages. You won’t be able to compile it until you install the framework. Let’s start. Open Visual Studio and create an ASP.NET Empty Web Application project. I used Visual Studio 2013 (it was about time) and .NET Framework 4.5. The first thing you must do is install the Ext.NET framework on your application. Luckily, the framework is free and available through the Nuget Packages.

As you can see it’s availabe for both Web Forms and MVC applications. Choose the Web Forms edition for this example. When the installation completes, you will find several files added to your application and changes in your Web.config file. If you want build and run the Ext.NET.Default.aspx created for you to ensure that you have successfully installed the framework. Now create a new Web Form page from scratch. To make this page able to use our new controls, you need to register the Ext.NET assembly at the page as follow:
<%@ Register Assembly="Ext.Net" Namespace="Ext.Net" TagPrefix="ext" %>
If you wish you can ommit the previous addition because when you installed the framework, this assembly was registered for all of your web forms in the Web.config file. Add the following style link inside the head elemenet, so you can use some of the available Ext.NET themes in your application.
<link type="text/css" rel="stylesheet" href="http://speed.ext.net/www/intro/css/main.css" />
The last thing you must do is to add a ResourceManager control in your page. Without it you won’t be able to use the controls. Add it after the body element as follow.
<body>
    <ext:ResourceManager runat="server" Theme="Neptune" />
One of the most used Ext.NET controls is the Panel control. The Panel is a container control which means it may have many other controls inside it. Add the following code after the ResourceManager control.
<body>
    <ext:ResourceManager runat="server" Theme="Neptune" />
    <ext:Panel runat="server" Title="Actors" Icon="Group" AutoScroll="true" Height="450" Width="700">
        <Items>
        </Items>
        <BottomBar>
            <ext:PagingToolbar runat="server" StoreID="ActorsStore" />
        </BottomBar>
    </ext:Panel>
</body>
If you build and run this page, here is what you have.
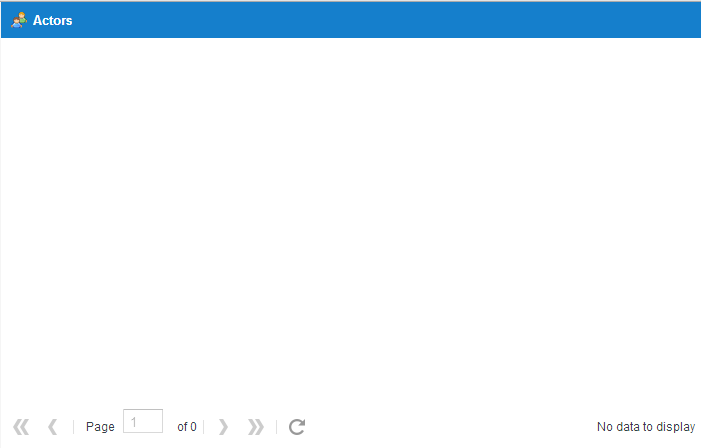
The above code is quite self explanatory but let’s point out the most important things we did. A Panel may have an Items collection, which is the items you want to be dislayed insided it. They may be buttons, grid, treelist, comboboxes or anything else you can imagine. Outside the Items collection you can add the so called ToolBars. Here we have added a BottomBar with a Pager control insided it. The StoreID parameter is what we are going to discuss now. If you are an MVC developer you will certainly be aware of the Model-View-Controller achitecture. Well.. this is what the Ext.NET Store control try to build. In a Store control, you define the Model and the Controller. The controller is represented by a Proxy control and the Model by a Model one. The model represents the type of data you expect to display. Take a look at the following model we will use.
<Model>
       <ext:Model runat="server" IDProperty="Id">
             <Fields>
                 <ext:ModelField Name="Id" />
                 <ext:ModelField Name="FirstName" />
                 <ext:ModelField Name="LastName" />
                 <ext:ModelField Name="DateOfBirth" Type="Date" />
                 <ext:ModelField Name="Age" Type="Int" />
                 <ext:ModelField Name="IsGoodActor" Type="Boolean" />
                 <ext:ModelField Name="Image" Type="String" />
                 <ext:ModelField Name="FamousFor" Type="String" />
             </Fields>
        </ext:Model>
</Model>
The ModelField elements will correspond to a relative class properties which we are going to create later. The IDProperty is the unique identifier for a Model record. In fact, let’s go ahead and create the Actor class right now.
public class Actor
    {
        public int Id { get; set; }
        public string FirstName { get; set; }
        public string LastName { get; set; }
        public bool IsGoodActor { get; set; }
        public DateTime DateOfBirth { get; set; }
        public string Image { get; set; }
        public string FamousFor { get; set; }
        public int Age
        {
            get { return DateTime.Today.Year - DateOfBirth.Year; }
        }
    }
Now back to the Store. We have to define a Proxy which describes how and where are our data retrieved from (Controller). There are many types of Proxy but here we will use an AjaxProxy which says that our data will be fetched though an Ajax requests.
<Proxy>
    <ext:AjaxProxy Url="CustomService.asmx/GetActors">
        <ActionMethods Read="POST" />
             <Reader>
                <ext:JsonReader Root="data" />
             </Reader>
    </ext:AjaxProxy>
 </Proxy>
You use this type of Proxy when you have a large amount of data to be displayed. If you had less data, you could use a PageProxy that would fetch all the data in the page at once. As you can see, we are going to retrieve our data through an ASMX web service named CustomService. A Store control lives inside a container, which in our case is a ext:DataView control. In this control, apart from the Store control which as we mentioned describes the Model and the Proxy (Controller), lives the Template control which in turn, describes the View or in other words, how we want to render our model. As you will see you can add any HTML elements you want.
<Tpl runat="server">
    <Html>
       <tpl for=".">
          <div class="info">
          <img src="/images/actors/{Image}.jpg" height="90" width="90" alt="Employee {Id}"/>
          <div style="font-weight:bold">{FirstName} {LastName}</div>
          <div>Dob: {DateOfBirth:date("m/d/Y")}</div>
          <div>Age: {Age}</div>
          <div>Is Good Actor? {IsGoodActorText}</div>
          <div>Famous For <a href="#" target="_blank">{FamousFor}</a></div>
          </div>
        </tpl>
      </Html>
</Tpl>
Line 3 defines that this template will be used for an array of elements that is multiple records of Actor objects. Values in brackets will be replaced by each model values. But what about line 9? There is no actor property named IsGoodActorText. Ext.NET allows you to configure your data before actually being displayed. Inside the DataView object and after the Template declaration, we will add a statement like this:
<PrepareData Fn="MyApp.actor.prepareActor" />
This will pass the current Actor object to a javascript function “prepareActor” before rendering it.
<script type="text/javascript">
        var MyApp = {
            actor: {
                prepareActor: function (data) {
                    data.IsGoodActorText = data.IsGoodActor === true ? 'Yes' : 'No';
                    return data;
                }
            }
        };
    </script>
Quite easy to understand. As we have mentioned, we want to be able to search for specific actors by their first name and sorting them by their last name as well. To achieve that, we will add a TopBar element to the Panel as follow.
<TopBar>
            <ext:Toolbar runat="server">
                <Items>
                    <ext:ToolbarTextItem Text="Filter:" runat="server" />
                    <ext:TextField ID="FilterText" runat="server" EmptyText="Filter by first name" />
                    <ext:Button runat="server" Icon="Find">
                        <Listeners>
                            <Click Handler="MyApp.actor.filter(#{FilterText}.getValue(), #{ActorsStore});" />
                        </Listeners>
                    </ext:Button>
                    <ext:ToolbarSeparator runat="server" />
                    <ext:Button runat="server" Icon="BulletArrowDown" Text="Sort by LastName">
                        <Listeners>
                            <Click Handler="#{ActorsStore}.sort('LastName', 'DESC');" />
                        </Listeners>
                    </ext:Button>
                </Items>
            </ext:Toolbar>
        </TopBar>
Here ‘s the result.
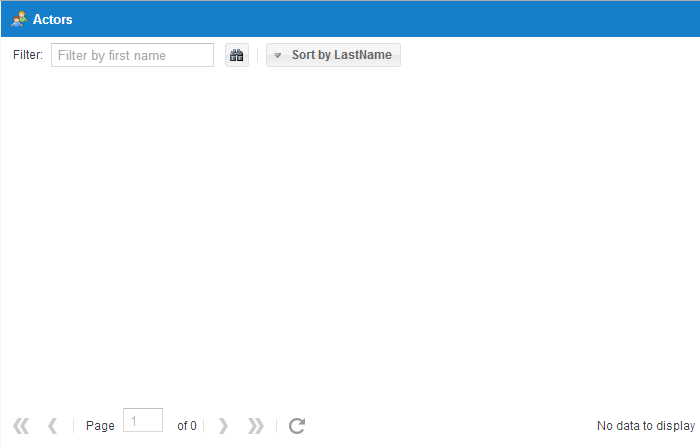
The first button, binds it’s client side click event to a filter javascript function, passing as a parameter the text value entered and the Store id.
<script type="text/javascript">
        var MyApp = {
            actor: {
                prepareActor: function (data) {
                    data.IsGoodActorText = data.IsGoodActor === true ? 'Yes' : 'No';
                    return data;
                },
                filter: function (text, store) {
                    store.filter('FirstName', text);
                }
            }
        };
    </script>
The second button calls the build in sort Ext JS function function for Store objects. Having said all that interesting things, here is the complete code for the Web Form page.
<html xmlns="http://www.w3.org/1999/xhtml">
<head runat="server">
    <link type="text/css" rel="stylesheet" href="http://speed.ext.net/www/intro/css/main.css" />
    <title></title>
    <style type="text/css">
        .info {
            margin: 10px 0% 0 2%;
            padding: 4px;
            display: inline-block;
            width: 184px;
            border: 1px solid #ddd;
            border-radius: 4px;
            box-shadow: 2px 2px 2px #999;
        }

            .info:nth-child(odd) {
                background-color: #eee;
            }
    </style>
    <script type="text/javascript">
        var MyApp = {
            actor: {
                prepareActor: function (data) {
                    data.IsGoodActorText = data.IsGoodActor === true ? 'Yes' : 'No';
                    return data;
                },
                filter: function (text, store) {
                    store.filter('FirstName', text);
                }
            }
        };
    </script>
</head>
<body>
    <ext:ResourceManager runat="server" Theme="Neptune" />
    <ext:Panel runat="server" Title="Actors" Icon="Group" AutoScroll="true" Height="450" Width="700">
        <Items>
            <ext:DataView runat="server" ItemSelector=".info">
                <Store>
                    <ext:Store ID="ActorsStore" runat="server" PageSize="5" RemoteSort="true" RemoteFilter="true">
                        <Model>
                            <ext:Model runat="server" IDProperty="Id">
                                <Fields>
                                    <ext:ModelField Name="Id" />
                                    <ext:ModelField Name="FirstName" />
                                    <ext:ModelField Name="LastName" />
                                    <ext:ModelField Name="DateOfBirth" Type="Date" />
                                    <ext:ModelField Name="Age" Type="Int" />
                                    <ext:ModelField Name="IsGoodActor" Type="Boolean" />
                                    <ext:ModelField Name="Image" Type="String" />
                                    <ext:ModelField Name="FamousFor" Type="String" />
                                </Fields>
                            </ext:Model>
                        </Model>
                        <Proxy>
                            <ext:AjaxProxy Url="CustomService.asmx/GetActors">
                                <ActionMethods Read="POST" />
                                <Reader>
                                    <ext:JsonReader Root="data" />
                                </Reader>
                            </ext:AjaxProxy>
                        </Proxy>
                    </ext:Store>
                </Store>
                <Tpl runat="server">
                    <Html>
                        <tpl for=".">
                        <div class="info">
                        <img src="/images/actors/{Image}.jpg" height="90" width="90" alt="Employee {Id}"/>
                        <div style="font-weight:bold">{FirstName} {LastName}</div>
                        <div>Dob: {DateOfBirth:date("m/d/Y")}</div>
                        <div>Age: {Age}</div>
                        <div>Is Good Actor? {IsGoodActorText}</div>
                        <div>Famous For <a href="#" target="_blank">{FamousFor}</a></div>
                        </div>
                        </tpl>
                    </Html>
                </Tpl>
                <PrepareData Fn="MyApp.actor.prepareActor" />
            </ext:DataView>
        </Items>
        <BottomBar>
            <ext:PagingToolbar runat="server" StoreID="ActorsStore" />
        </BottomBar>
        <TopBar>
            <ext:Toolbar runat="server">
                <Items>
                    <ext:ToolbarTextItem Text="Filter:" runat="server" />
                    <ext:TextField ID="FilterText" runat="server" EmptyText="Filter by first name" />
                    <ext:Button runat="server" Icon="Find">
                        <Listeners>
                            <Click Handler="MyApp.actor.filter(#{FilterText}.getValue(), #{ActorsStore});" />
                        </Listeners>
                    </ext:Button>
                    <ext:ToolbarSeparator runat="server" />
                    <ext:Button runat="server" Icon="BulletArrowDown" Text="Sort by LastName">
                        <Listeners>
                            <Click Handler="#{ActorsStore}.sort('LastName', 'DESC');" />
                        </Listeners>
                    </ext:Button>
                </Items>
            </ext:Toolbar>
        </TopBar>
    </ext:Panel>
</body>
</html>
Before running it we need to create the Web Service we mentioned that the Store object depends on. Add a new ASMX Web Service named “CustomService.asmx” in your application. Make sure you uncomment the [ScriptService] attribute line above the class declaration so you can call it from script. Add a list of Actor objects as follow.
List<Actor> list = new List<Actor>
            {
                new Actor {
                    Id = 1,
                    FirstName="Brad",
                    LastName= "Pitt",
                    DateOfBirth = DateTime.ParseExact("18/12/1963","dd/MM/yyyy",null),
                    Image = "brad-pitt",
                    IsGoodActor = false,
                    FamousFor = "Fight Club"
                    },
                    new Actor {
                    Id = 2,
                    FirstName="Christian",
                    LastName= "Bale",
                    DateOfBirth = DateTime.ParseExact("30/01/1974","dd/MM/yyyy",null),
                    Image = "Christian-Bale",
                    IsGoodActor = true,
                    FamousFor = "Batman"
                    },
                    new Actor {
                    Id = 3,
                    FirstName="Emma",
                    LastName= "Roberts",
                    DateOfBirth = DateTime.ParseExact("10/02/1991","dd/MM/yyyy",null),
                    Image = "Emma-Roberts",
                    IsGoodActor = false,
                    FamousFor = "We 're the Millers"
                    }
                    ,
                    new Actor {
                    Id = 4,
                    FirstName="James",
                    LastName= "Franco",
                    DateOfBirth = DateTime.ParseExact("19/04/1978","dd/MM/yyyy",null),
                    Image = "james-franco",
                    IsGoodActor = true,
                    FamousFor = "127 Hours"
                    }
                    ,
                    new Actor {
                    Id = 5,
                    FirstName="Jennifer",
                    LastName= "Anniston",
                    DateOfBirth = DateTime.ParseExact("11/02/1969","dd/MM/yyyy",null),
                    Image = "Jennifer-Aniston",
                    IsGoodActor = true,
                    FamousFor = "Friends"
                    },
                    new Actor {
                    Id = 6,
                    FirstName="Kate",
                    LastName= "Beckinsale",
                    DateOfBirth = DateTime.ParseExact("26/06/1973","dd/MM/yyyy",null),
                    Image = "Kate-Beckinsale",
                    IsGoodActor = true,
                    FamousFor = "Underworld"
                    },
                    new Actor {
                    Id = 7,
                    FirstName="Kristen",
                    LastName= "Stewart",
                    DateOfBirth = DateTime.ParseExact("09/04/1990","dd/MM/yyyy",null),
                    Image = "Kristen-Stewart",
                    IsGoodActor = false,
                    FamousFor = "Twilight"
                    },
                    new Actor {
                    Id = 8,
                    FirstName="Mark",
                    LastName= "Wahlberg",
                    DateOfBirth = DateTime.ParseExact("05/06/1971","dd/MM/yyyy",null),
                    Image = "Mark-Wahlberg",
                    IsGoodActor = true,
                    FamousFor = "The Fighter"
                    },
                    new Actor {
                    Id = 9,
                    FirstName="Michael",
                    LastName= "Hall",
                    DateOfBirth = DateTime.ParseExact("01/02/1971","dd/MM/yyyy",null),
                    Image = "Michael-Hall",
                    IsGoodActor = true,
                    FamousFor = "Dexter"
                    },
                    new Actor {
                    Id = 10,
                    FirstName="Monica",
                    LastName= "Bellucci",
                    DateOfBirth = DateTime.ParseExact("30/09/1964","dd/MM/yyyy",null),
                    Image = "Monica-Bellucci",
                    IsGoodActor = false,
                    FamousFor = "Malena"
                    },
                    new Actor {
                    Id = 11,
                    FirstName="Natalie",
                    LastName= "Portman",
                    DateOfBirth = DateTime.ParseExact("09/06/1981","dd/MM/yyyy",null),
                    Image = "Natalie-Portman",
                    IsGoodActor = true,
                    FamousFor = "V for Venetta"
                    },
                    new Actor {
                    Id = 12,
                    FirstName="Penelope",
                    LastName= "Cruz",
                    DateOfBirth = DateTime.ParseExact("28/04/1974","dd/MM/yyyy",null),
                    Image = "Penelope-Cruz",
                    IsGoodActor = false,
                    FamousFor = "Blow"
                    },
                    new Actor {
                    Id = 13,
                    FirstName="Scarlett",
                    LastName= "Johansson",
                    DateOfBirth = DateTime.ParseExact("22/09/1984","dd/MM/yyyy",null),
                    Image = "Scarlett-Johansson",
                    IsGoodActor = false,
                    FamousFor = "Lost in Translation"
                    },
                    new Actor {
                    Id = 14,
                    FirstName="Tom",
                    LastName= "Cruise",
                    DateOfBirth = DateTime.ParseExact("03/07/1962","dd/MM/yyyy",null),
                    Image = "Tom-Cruise",
                    IsGoodActor = false,
                    FamousFor = "Top Gun"
                    }
            };
The Image values point to images which I downloaded from the IMDB official site. You will find them inside the project I uploaded. If you recall, we declared in our template how we want our images to be displayed:
<img src="/images/actors/{Image}.jpg" height="90" width="90" alt="Actor {Id}"/>
Let us recapture how our Proxy object retrieves the actor objects.
<Proxy>
   <ext:AjaxProxy Url="CustomService.asmx/GetActors">
       <ActionMethods Read="POST" />
        <Reader>
           <ext:JsonReader Root="data" />
        </Reader>
    </ext:AjaxProxy>
</Proxy>
We need to add a GetActors WebMethod in the CustomService web service.
[WebMethod]
public void GetActors()
{
   Thread.Sleep(500);
   HttpContext.Current.Response.ContentType = "application/json";
   var requestParams = new StoreRequestParameters(HttpContext.Current);
   int start = requestParams.Start;
   int limit = requestParams.Limit;
   string filter = requestParams.Filter.Length > 0 ? requestParams.Filter[requestParams.Filter.Length-1].Value.ToLower() : "";
   string sort = string.IsNullOrEmpty(requestParams.SimpleSort) ? "Id" : requestParams.SimpleSort;
   string sortDirection = requestParams.SimpleSortDirection.ToString() != "Default"  ? requestParams.SimpleSortDirection.ToString() : "ASC";
   Paging<Actor> actors = GetData(start, limit, sort, sortDirection, filter);
   HttpContext.Current.Response.Write(JSON.Serialize(actors))
}
There are quite a few interesting facts here. First of all, on purpose I set a delay of half a second, so you can see a mask on your page, while requesting for new results with an Ajax request. Notice how we are able to find specific parameter values from the Httpcontext.Current object. Those parameters have been sent from specific elemenets we created in the Web Form. For example, tha BottomBar pager needs the start and limit request parameters so it knows how many records to display and how many actually exist. They all are connected with the Store element. For example:
<ext:PagingToolbar runat="server" StoreID="ActorsStore" />
<ext:Button runat="server" Icon="Find">
 <Listeners>
    <Click Handler="MyApp.actor.filter(#{FilterText}.getValue(), #{ActorsStore});" />
 </Listeners>
  </ext:Button>

  <ext:Button runat="server" Icon="BulletArrowDown" Text="Sort by LastName">
     <Listeners>
         <Click Handler="#{ActorsStore}.sort('LastName', 'DESC');" />
     </Listeners>
 </ext:Button>
The GetData() function simply checks what exactly want to do and retrieves the respective data.
public Paging<Actor> GetData(int start, int limit,string sortedBy, string dir, string filter)
        {
            if(!string.IsNullOrEmpty(filter))
            {
                return new Paging<Actor>(list.Where(e=>e.FirstName.ToLower().Contains(filter)).Skip(start).Take(limit)
                    .OrderBy(e => e.Id), list.Count(e => e.FirstName.ToLower().Contains(filter)));
            }
            if (sortedBy == "LastName")
            {
                return new Paging<Actor>(list.Skip(start).Take(limit)
                  .OrderByDescending(e => e.LastName), list.Count);
            }
            else
            {
                return new Paging<Actor>(list.Skip(start).Take(limit)
                    .OrderBy(e => e.Id), list.Count);
            }
        }
That’s it, we are ready to go (you may have to clink the GIF image below to see it working).
I hope you have enjoyed this Ext.NET introduction cause there are going to be many posts for this framework. You can download the project we created from here (as i have mentioned you need to install the Ext.NET framework by yourself to compile).
Categories: ASP.NET

i need this for framwork 4 , am new for Ext.Net